Raise your hand if you’re feeling anxious right now? This election cycle has me experiencing heart palpitations. I try not to think of it too much, and I definitely haven’t been checking the news or social media, but still the suspense is killing me. When will this election be over???
Anyway, since food has a way of comforting the soul (and belly), I’ve put together a list of my 10 favorite anti-anxiety recipes. 5 are sweet, 5 are savory. All are fun to make, and even more fun to eat. So turn off the news, give your phone a little vacation, and come into the kitchen with me
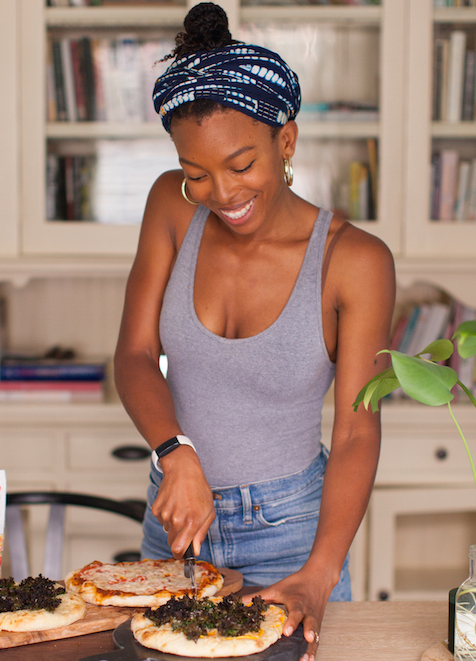
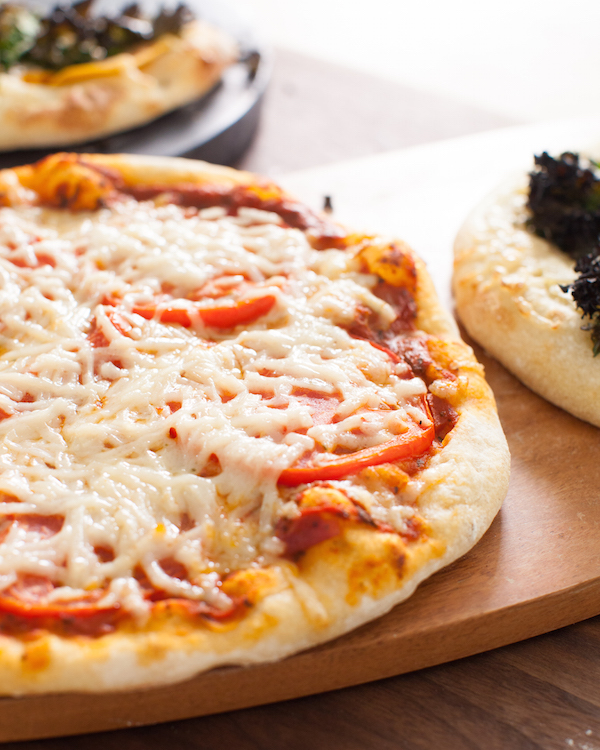
I was blind, but now I see. Sourdough pizza is one of the most perfect foods. To make it at home, you don’t need a bunch of fancy tools or ingredients. All it takes is a few basic ingredients and lots of patience. As a new convert to the church of DIY sourdough, I can tell you that it’s worth the wait to achieve a flavorful, chewy, and airy crust at home.
To make sourdough pizza, you need a sourdough starter. A sourdough starter is basically a culture of bacteria and wild yeast that you use for baking sourdough breads and pizza. You cultivate the bacteria and wild yeast by mixing flour and water, and continuing to feed your mixture everyday until it is bubbly, sour (in a good way), and mature enough to make dough rise. Added to dough, the bacteria and yeast begin the process of fermentation, the result being bread that has a degree of sourness/tanginess, air bubbles, and a tantalizing aroma. Making your sourdough starter at home is very easy, but depending on the temperature of your kitchen it could take a few days or more than a week. Check out this blog post for instructions for making your starter. If you have a friend who is already making sourdough bread, ask them to share their starter so you can get started on this sourdough pizza sooner.
Now that you have your sourdough starter ready, it’s time to bake some incredible pizza. You don’t need a fancy pizza stone, special water, or expensive flour to make this. You will need a kitchen scale, and at least 1 baking sheet––I like using a cast iron baking pan or cast iron skillet best because you can preheat it and achieve a crispier crust, but a regular cooking sheet will do.
Other than that, you’ll need:
mature sourdough starter
unbleached all-purpose flour
salt
water
pizza toppings
lots of time
Since sourdough pizza (and sourdough everything) takes a long time, I recommend getting started on your pizza crust at least 3 days before you want to bake it. You could do it sooner, but in the event of any schedule hiccups, 3 days will give you the most flexibility. Another thing I love about sourdough pizza is that the crust freezes well. Watch the video below to watch step-by-step how I make sourdough pizza. Any of the technique I mention in the recipe is demonstrated in the video.
The video was sponsored by Daiya vegan cheese, but you can use any vegan cheese for your sourdough pizza. I happen to be allergic to cashews so my options are limited, and I do love the ease and affordability of Daiya. You could also skip the vegan cheese all together, or make your own.
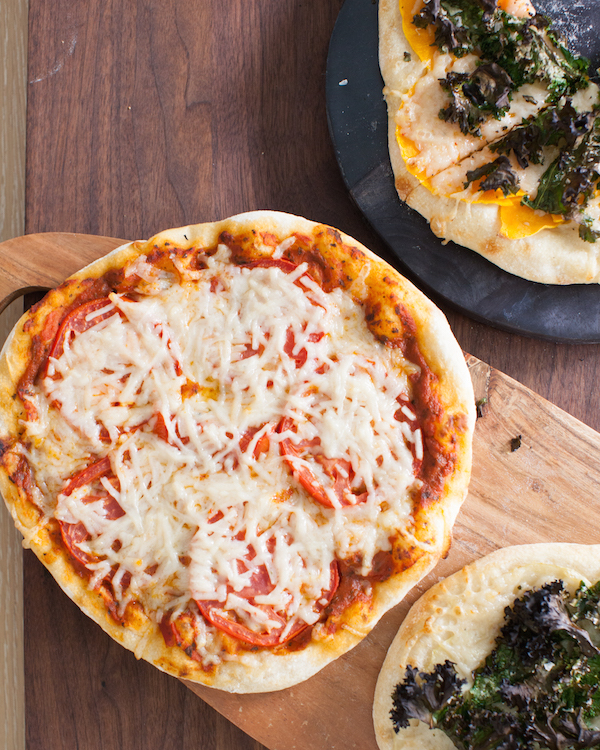
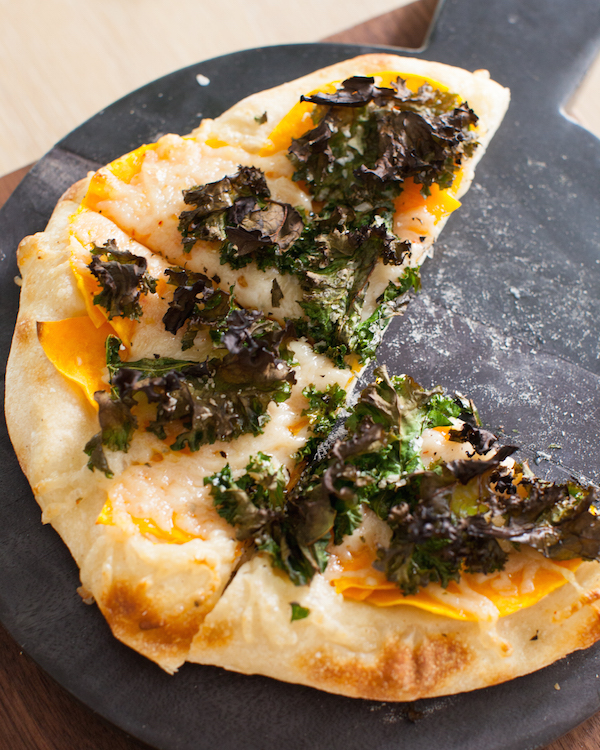
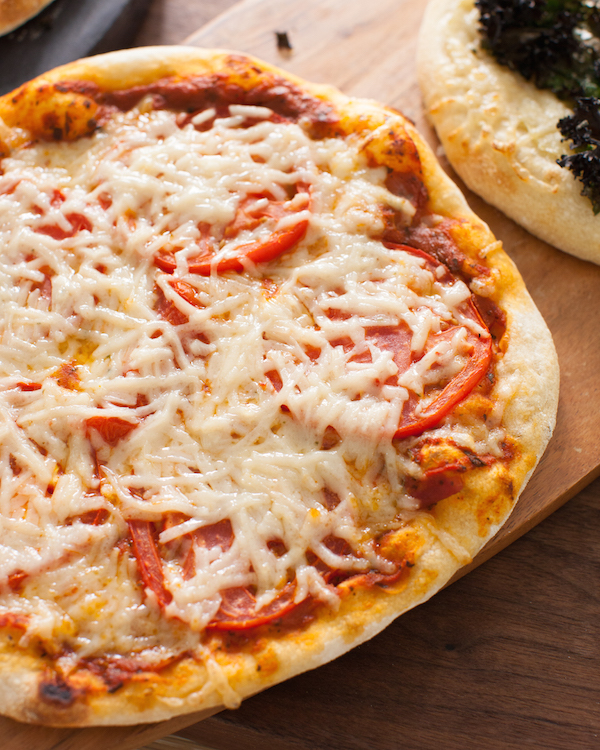
I always make a combination of classic cheese pizza with tomato sauce, a potato pizza with kale, and, since it’s currently fall, my favorite is butternut squash and kale. My other favorite toppings are: mushrooms, garlic, broccoli rabe, artichoke, and olives. Add fresh basil or other soft herbs and greens when the pizza comes out of the oven. Same with finishing extra virgin olive oil, and black pepper.
This recipe comes from Alexandra Cooks. Check out her blog post for more details, and for amazing close-up photos of sourdough pizza. I’ve whittled down the process to include the steps that made the most sense for me, and included the video to show you a simple step-by-step of the process. If you have any questions make sure to watch my video, or visit the Alexandra Cooks blog post. And I implore you, do not be intimidated by sourdough pizza. The process, at least for me, is a lot easier than sourdough bread. As long as you have a mature sourdough starter, a warm kitchen/house, and patience, you will be successful!
If you’re craving pizza right now, and don’t have your sourdough starter ready yet, try my pizza recipe made with store-bought yeast. Or for something a bit more adventurous (yet still delicious), try my cauliflower crust pizza, or black bean crust pizza!
This recipe comes from Alexandra Cooks. Use a kitchen scaleto measure the ingredients in grams. Metric measurements are more precise for baking sourdough pizza and bread. I don't have experience measuring sourdough ingredients in cups, so I cannot guarantee that will work.
Author: Jenné
Serves: 8
Ingredients
Sourdough Pizza Dough
375 g water
100 g sourdough starter
10 g salt
500 g all-purpose or bread flour
Marinara Cheese Pizza
1 cup seasoned tomato sauce (I make my own, or use a jar)
1 cup vegan mozzarella style cheese
handful fresh basil (add after pizza
Potato Kale Pizza (or Butternut Squash)
1 cup vegan mozzarella style cheese
2 cloves garlic, minced
1-2 cups sliced yukon potato OR butternut squash, must be very thinly sliced
3 cups kale, torn into chunks
½ tsp olive oil (drizzle on after pizza has cooked)
Instructions
Mix the dough
In a bowl, combine the water, starter, and salt and stir to break up and sort of dissolve. It doesn't need to be perfectly dissolved.
Add the flour, and stir until combined. You can use your hands to help, by squeezing the ingredients. It will be extremely sticky.
Transfer the dough to a greased bowl, and cover with a kitchen towel, and let it rest for 30 minutes.
Let the dough rest for 30 minutes, then repeat the stretch and fold 3 more times. 4 times total.
Ferment & Rise
Now that you've finished the stretch and fold, cover the dough with a kitchen towel and leave it on your counter at room temperature, about 70-75°, for 8-12 hours.
The dough should rise 50-100% (or double). I let it sit on the counter overnight or at the beginning of the day. Depending on your house it could take more or less time to rise.
Alexandra Cooks (the blog I took this recipe from) says that she has better structure in dough that has been allowed to rise 50% rather than double. I let mine double and have also had fantastic results.
Portion it
Now that your dough has risen, transfer it to a heavily floured workspace. I like to flour my hands before transferring the dough so that it doesn't stick as much.
Use a bench scraper or a knife to cut the dough into 4 equal portions.
Next you'll need to shape the dough into tight balls. To do this, fold the bottom of the dough under and spin the dough as you do this. Watch this to see how it's done.
Line a baking pan with parchment or a cotton tea towel, and sprinkle a bit of whole wheat flour on the surface.
Transfer the dough balls to the tea towel, and fold the towel to create a divider so that the dough doesn't stick.
Cover the dough with a plastic bag (I use a clean grocery bag), and twist to close it up.
Let the dough sit in the refrigerator for at least 6 hours or up to 3 days, after which you can freeze the dough if you don't want to use it right away.
Make your pizza crust
Take as many dough balls out of the refrigerator as you would like to bake, and set them on a floured workspace.
Let them come to room temperature for about 1 hour. I have rushed this process with good results. The point of letting it warm up is that it will make it much easier to work with the dough.
Preheat the oven to 550°, and place your pizza stone or cast iron in the oven while it heats.
Shape the dough into a round pizza crust, about 10". You can make it thin or thick crust. I always make thin crust.
Transfer the crust to parchment paper, then top.
Transfer the pizza on parchment paper to the hot baking vessel, then bake for 6 minutes, or until the crust is golden.
You can bake more than one pizza at a time if you have enough baking pans.
Remove from the oven and add your fresh basil, extra virgin olive oil, or other delicate toppings. Let the pizza cool a couple minutes before serving.
This matcha sticky buns recipe is sponsored by Lodge. They recently launched their new cast iron bakeware line and I’m here for it. I usually use my well-loved Lodge cast iron skillet to bake cinnamon rolls, but now I’m using the new Lodge cast iron Casserole Pan. This new bakeware line is everything you love about your cast iron skillet, but made for baking anything your heart desires.
Even living in Los Angeles where the weather is almost always pleasant, my heart still yearns for just a little more summer. I think what I love most about summer in LA is that it’s watermelon and peach season. All season we gorge ourselves on the sweetest fruits straight from the farmer’s market, and I’m sad to see that go.
Fall certainly has its appeals too! When I lived in NYC, the transition from summer to fall was easy and invited. I loved how the air took on a chill and the leaves turned bright red, yellow, and orange. A light jacket replaced my bare shoulders, and boots with cozy socks kept my toes warm. And on top of all that charm, it is the season of pumpkin everything, comforting stews, and cinnamon rolls.
I know, you can totally eat cinnamon rolls any time of year. But there’s nothing like indulging in one on a cool morning with a hot cup of coffee (or matcha) while you watch the leaves change colors and rustle in the wind.
This week I was craving a different type of cinnamon roll, or sticky bun. Since visiting Japan in 2015, I’ve become quite the fan of matcha in everything. Some people want pumpkin spice, I want matcha. The earthy flavor adds depth and delight to baked goods, and the green color is eye candy before first bite. I had never made matcha sticky buns, so here we are now. Matcha sticky buns with chocolate filling, because matcha and chocolate are a match(a) made in heaven
Even if you live in LA, or the tropics, and don’t experience that lovely fall transition, these matcha sticky buns are still just as wonderful!
Some notes on this recipe:
I always use a cast iron skillet to make my cinnamon rolls. Well, I had been doing that until Lodge came out with this new line of cast iron bakeware. To make these matcha sticky buns I used the casserole pan. It is naturally non-stick, helps bake your sticky buns to perfection, and the dual handles make it easy to take in and out of the oven, and easy to transport––perfect for potlucks and celebrations. Cast iron is easy to care for. Here are my two tips: 1.) Avoid letting it sit in water, or liquid sit in it for a long time, and 2.) Season it by rubbing a layer of oil onto the surface after each wash.
Matcha comes in different grades and qualities. The most expensive type is ceremonial grade. That’s the kind you use sipping. Then there is culinary matcha, that’s the kind you might use for matcha lattes, smoothies, and this recipe. Culinary matcha comes in different quality levels too, so I recommend the kind that you would also use for drinking. For this recipe I likeUjido ceremonial blend matcha powder, orEncha culinary blend matcha powder. These two matchas are also great for matcha lattes (which I drink every single morning), so you won’t be using it just for these matcha sticky buns. If you’re already a matcha lover, this recipe is perfect for you.
2-4 tbsp plain unsweetened plant milk, start with 2 tbsp and add a little at a time to thin while you whisk
Instructions
The Dough
Warm the plant milk and vegan butter on the stove or in the microwave until butter is melted. Should take about 1 minute in the microwave. Check after 30 seconds.
The liquid should not exceed 110°, so use a kitchen thermometer to check. Any hotter and you'll kill the yeast.
Once the liquid is around 100-110°, sprinkle the yeast over the top of it, and let it sit for 10 minutes.
Transfer it to a large mixing bowl, or the bowl of your stand mixer, and stir in the sugar and salt.
In another mixing bowl combine the flour and matcha powder. If your matcha is very clumpy, use a mesh strainer to sift it into the flour. Mix well.
Add the flour mixture into the wet ingredients ½ cup at a time, stirring all the while. If you are using the stand mixer, use the knead attachment to mix the dough as you add the flour.
When you can no longer stir it, transfer it to a floured workspace, and gently knead it until you've formed a smooth ball. If you're using the stand mixer, no need to knead it by hand, simply form into a ball.
Place the dough ball into a lightly greased mixing bowl, and cover with plastic wrap or a kitchen towel, and allow it to rise for about one hour.
The filling
Mix the sugar and cocoa powder together in a small bowl.
Assembling the sticky buns
Preheat oven to 350°.
Once the dough has doubled in size, you can press out the air, then transfer it back onto your floured work space.
Roll the dough until it is about ⅙th inch thick, and about 12x16 inches.
Brush the dough with the melted vegan butter, and top evenly with the sugar cocoa mix, then sprinkle on the chopped chocolate.
This Caribbean-inspired Vegan Bento Box Meal Prep is my best meal plan yet! It’s perfect for any time of year, totally delicious, easy to make, freezable, and includes a sweet treat!
Unless you have someone else cooking for you, or you can spend hours cooking everyday, meal prepping is the best way to maintain a healthy diet. Since becoming a mom one of my biggest challenges hasn’t been eating the right foods, it has been eating enough food. I snack and graze, and often don’t have the time or energy to prepare myself a wholesome meal. By dinnertime, I’m ravenous!
Luckily, the solution is simple: meal prep! So as often as I can, I get into the kitchen and prepare a number of dishes that I can eat for days. This week I prepared a simple yet delicious meal prep that is inspired by the delicious tropical flavors of the Caribbean: coconut rice, curried pumpkin seeds, a coconut cilantro pesto, grilled tofu, and tender black beans. Together or mixed-and-matched these dishes can make a hearty Buddha bowl, tasty tacos, a filling wrap, an entree salad, or even a tropical sandwich. By mixing and matching a few simple dishes, I make sure it doesn’t feel like I’m eating the same thing every day.
You could even supplement this simple vegan Bento Box Meal Prep with a couple of stews (try this tempeh tikka masala), or veggie burgers (like my sweet potato burgers, or beet black bean burgers). Or make yourself some yummy Mexican rice to make the meal prep last even longer.
Most of these dishes freeze well––with the exception of the roasted sweet potatoes, tofu, and cabbage-–so feel free to double (or triple) the recipes to make more to freeze. Frozen meals are another key to successful healthy eating.
The curried pepitas (pumpkin seeds) and the coconut cilantro pesto are absolutely delicious on anything. Even if you’re not making the whole meal prep, these two are a must for easy snacking, and flavor to any meal. Plus they’re both super duper easy to make.
Click here for a PDF version of this Vegan Bento Box Meal Prep + combination ideas and a shopping list! Sign up for my newsletter if you’d like more free meal prep guides. I send them every week!
You could use shredded broccoli or cauliflower stems instead of cabbage. You could also do this with brussels sprouts. If you don't want a slaw at all, use the dressing for romaine and/or kale.
Author: Jenné
Serves: 4-6
Ingredients
¼ red cabbage
3 carrots
Instructions
Using the shredder attachments from your food processor, shred the cabbage and carrots. *Note: they use different attachments: the single blade is for the cabbage, and the shredder for the carrots.
If you don’t have a food processor, shred by hand on a cheese grater. If you don’t have a cheese grater, thinly slice the cabbage, and use a handheld grater for the carrots.
Place the veggies in a bowl.
Pour the remaining marinade/dressing from the grilled tofu over the veggies, and use your hands to massage.